
Local Tulips: From Planting to Harvest
- Linnea
- Oct 22
- 9 min read
A Brief History:
The first record of Tulips comes from a book of poems thought to have been written between the late 11th century and early 12th century AD; the Rubaiyat of Omar Khayyam. Through research, the native location of early tulips is thought to be the mountains and steppes of Asia Minor, the Near East, and Mediterranean areas. Their habit of blooming in the springtime after the cold winters, along with their rarity, bright coloring, and elegant shape made them extremely sought after once they entered the Ottoman Empire, then Europe, and later the Americas. Today, they are a staple in landscaping and gardens alike, and symbolize many things depending on the color of the bloom, such as Rebirth, Deep Love, Charity, and Hope.
Over the decades, tulips have earned their spot alongside roses, orchids, and lilies as one of the most recognized flowers in the world. I myself can’t help but adore their sleek, minimalistic shape and how they carry some of the first colors into spring after a long winter here in the Ohio River Basin area. Here at Dilly Dally Meadows, I curate a list of unique and gorgeous tulip blooms so that you can get your tulip fix locally in Columbus, Indiana. Keep on reading to find out about our tulip growing process and learn some tips and tricks about these perfect springtime flowers!

Prepping your Planting Area
Tulips should be planted in an area that has full sun, and soil that drains well and does not become overly saturated or puddled after rains or snows. The bulbs of tulips hold an “energy pack” for the plant, and not much needs to be added to your soil to make them happy. However, they do prefer a ph of 6.0 to 7.0, and can benefit from a single application of fertilizer once they emerge from the ground. We recommend Neptune’s Harvest from Foxy Farms, or another well-balanced natural fish-emulsion and kelp fertilizer.
At Dilly Dally Meadows, we plant thousands of bulbs each year, and we use raised beds to do this. To create these beds, we frame the required area with cedar fence posts laid on their sides and locked between pairs of rebar or conduit (for more permanent beds, you can create a sturdier frame by screwing the planks together). We then add a layer of compost mixed with tree leaves which have dropped, filled to 8 inches. Just be sure that the leaves you use haven’t been treated with any harsh chemicals throughout the year, so that those lingering effects won’t harm your soil and tulips! The reason that we do these raised beds is two-fold. Firstly, we are able to plant the tulips far easier than having to dig down 8 inches into the soil and potentially hit any utilities or hurt our backs. Also, once the tulips are all pulled, we are able to spread half (4 inches) of the compost mixture to the rest of the garden, which will greatly benefit our summer flowers! Tulip Fire, a disease specific to tulips which spreads like crazy, is caused by a fungus in the soil, and can last in the ground for years. Because of this, it is highly recommended that when mass plantings of tulips are planted, to not place them in the same soil for 7 years. By using raised beds which use fresh material each year, the risk of Tulip Fire is much lower.

Planting and Spacing
If you are planting in the landscaping, or in the field, and you’ve found a well-draining spot which has sun 6+ hours a day, then you’re ready to plant! For zones which experience cold enough winters, plan to plant your tulips in late October or early November, once temperatures have started showing downward trends. If you are using the raised bed method, follow the steps found above in “soil prep” section. If you are planting into your landscaping or yard/field with soil already in place, grab yourself a shovel or trowel and get ready to dig!
Tulip bulbs can be planted as far apart or as close together as you’d like, depending on what you are planting for. For cutting, spacing bulbs half an inch from one another, or even touching, will maximize your use of space. For tulips you hope to see come up another couple years and do not plan on cutting, space bulbs 3-4” so that they do not bump into each other as the bulbs expand.
Something to note about tulip bulbs: they don’t give a hoot how they’re planted! Those babies can go in upside down and bloom just fine, which means if you are planting in large quantities (like us), you can dump those puppies right into your area, just be gentle and careful not to bruise any bulbs while you’re at it. Once you’ve got 0your bulbs into the ground, place back your soil up to halfway, and water thoroughly, then place the remaining amount of soil back on top. Because the bulbs are planted deep, it is more effective to water this way so that you know the water gets to where it needs to. After all soil has been replaced back on top of the bulbs, add a layer of mulch to maintain moisture, temperature, and prevent weeds.
Growing On
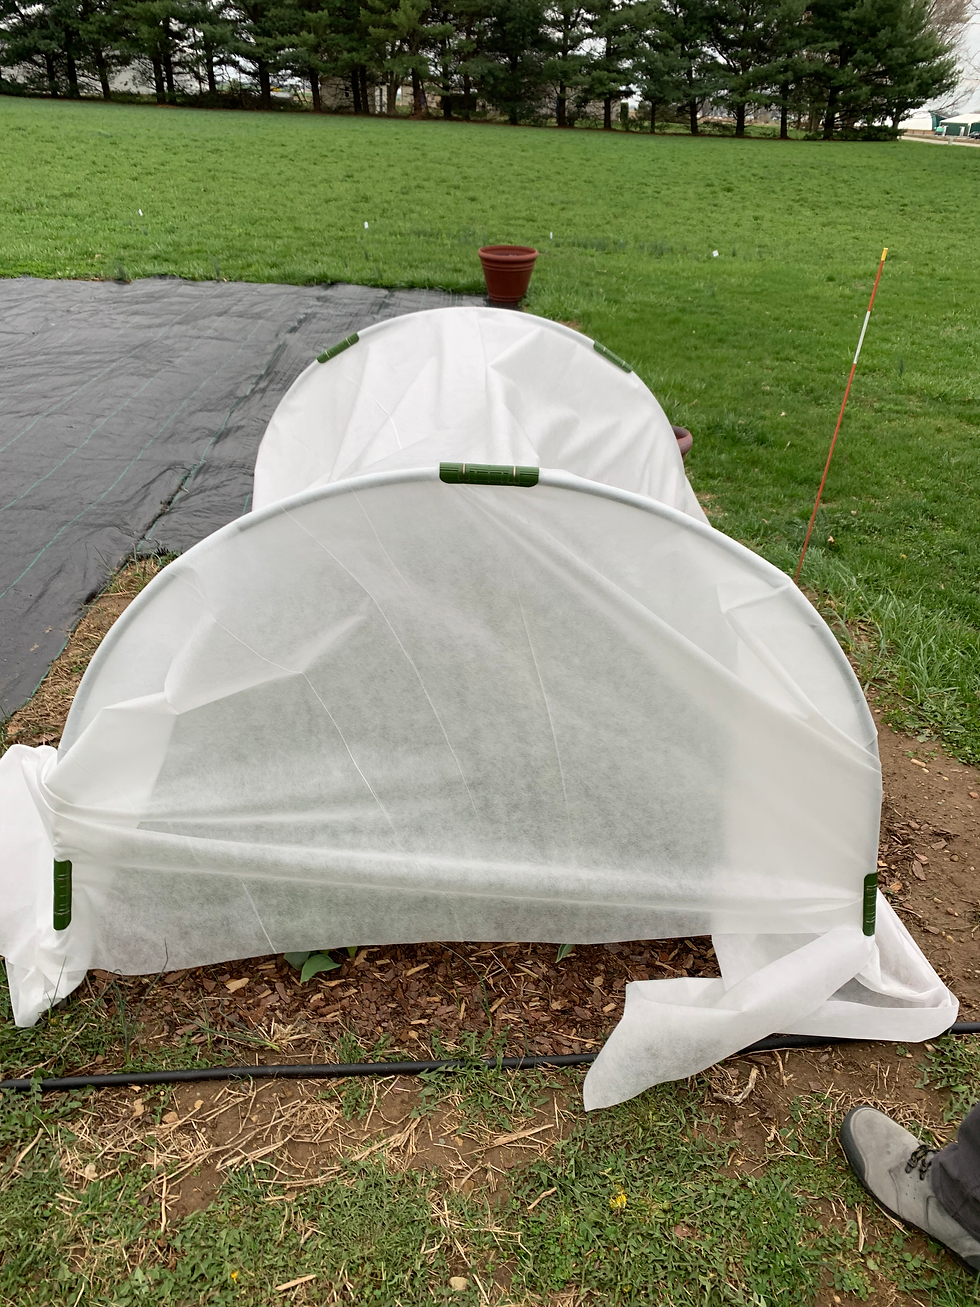
Through the winter, tulips are relatively low maintenance. The only thing you may have to do is cover them in frost cloth depending on the weather and their growth stage. We typically see our earliest tulips start to poke out of the ground in the beginning of March. Tulips can withstand a good amount of cold, down to 25 degrees fahrenheit for the foliage, and 31 degrees fahrenheit before any developed/colored buds bruise. High winds, hail, and Ice storms, on the other hand, bring a pretty decent threat to the plant, so these would definitely be times to get cover on your tulips if they are not otherwise shielded by buildings or other plants/trees. Especially here in central Indiana, when we are entering mid-April and weather can get pretty exciting!

Harvesting
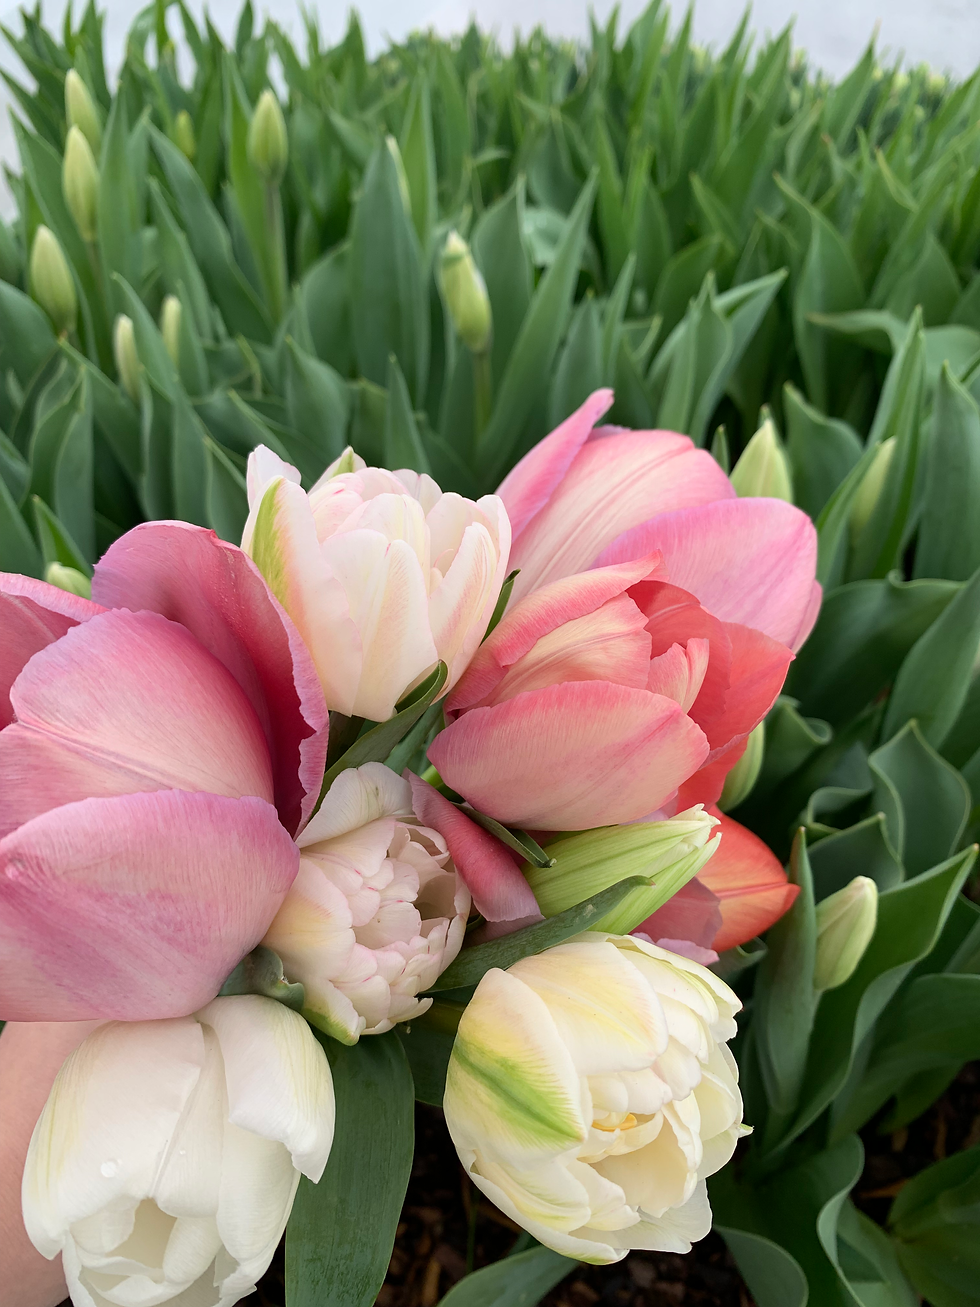
For us, harvest timing is a crucial element to getting the flowers to our community in just the right stage of growth. Like with most flowers, there is an optimal time to harvest tulips to ensure a long vase life. Pulling too early can result in a bud that won’t open, and pulling too late will give you a shortened vase life. For tulip varieties that are single-petaled, meaning that there is a single layer of petals, the harvest stage is when you can just start to see the color of the petals in the spaces where the petals meet, or at the tip of the bud. For double-petaled varieties, or peony types, harvest time is best when the buds are roughly ¼ to ½ colored up, and petals seem to jussst slightly separate off each other. Be vigilant though! Once one of your tulips in a variety is ready to harvest, the others won’t be too far behind. Warmer weather and clear skies will speed up the readiness of a tulip, so it is important to check on these throughout the day, potentially every couple hours, to minimize the amount of loss due to over-ripeness. Of course, tulips that have “blown out” in the field are featured in our photos and fun to practice arranging with.
In order to harvest the tulip, we reach down to the base of the stem, where it meets the soil, firmly grasp with our thumb pointing down toward the soil, and pull DIRECTLY up from the ground. Depending on how loose and/or damp the soil is, its stem will either snap off from the bulb, or the bulb will come up with the stem. With the raised bed method, the bulb will most definitely come up with the stem. However, this is not necessarily guaranteed for the in-ground method. Our first tulip season was done in-ground, and after it was over, digging out the remaining bulbs to prevent any lingering diseases from spreading in the soil was one hell of a chore. Definitely something I will not be going back to doing!
Industry Insight
Once a tulip is cut, it will not come back the next year. (Beware of anyone trying to sell you their post-season bulbs! Yes, I’ve seen this happen) In order for a Tulip to rebloom year after year, the foliage must be left attached to the bulb so that the bulb can restore its nutrient reserves for the winter months. If these leaves are removed, your tulip will not come back. This is what makes Tulips one of the most expensive flowers to grow as a flower farmer. Due to the cost of bulbs, labor and time-intensive harvest, and flower-to-“seed” ratio of 1:1 (a very womp-womp ratio in this industry by the way) the lovely tulip is often shunted from a farm’s crop list. Throw in the very devastating event of a Tulip-Fire season destroying a plot of thousands of tulips, and I wouldn’t blame the farmer that swears them off for good!
Processing for Storage
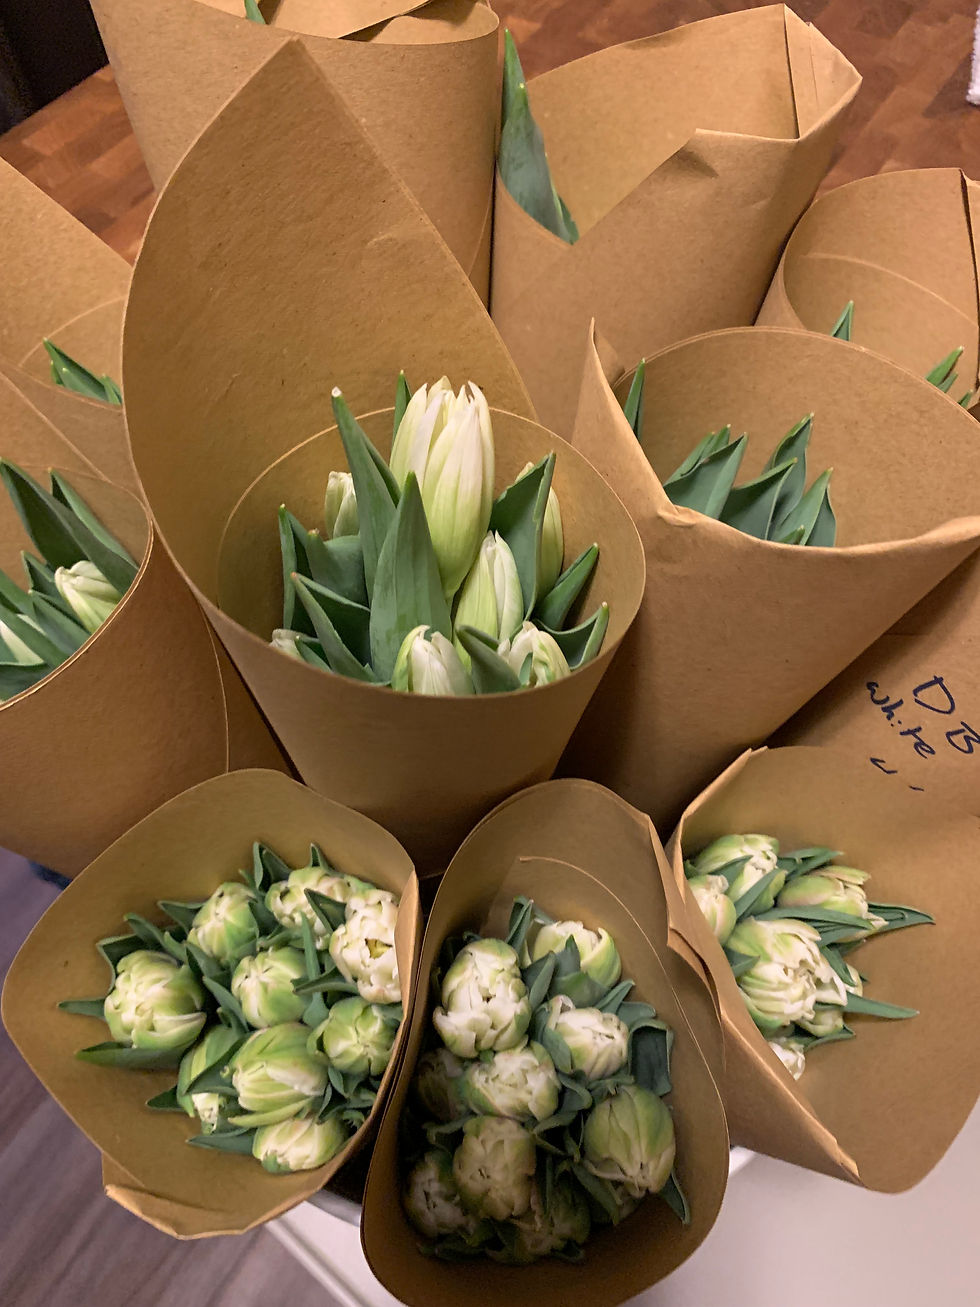
Tulips can be pretty erratic about when they decide to be harvestable and have a tendency to ripen quickly when stored in a warm environment. Because of this, we store ours dry (without a water source) in the cooler at very cold temps (32-33 degrees Fahrenheit) as they wait to be added to orders. To prevent the Tulips from developing ice crystals within the buds or succumbing to botrytis blight due to damp storage, we are sure to thoroughly dry the stem after cleaning any dirt off, and placing the stems in a cool dry place with a fan to dry out the petals and buds. We have found that bundling the tulips and hanging them upside down in front of a fan is the best method.
Our first year, we had a very very wet spring, If you are from around here, I'm talking about the spring of 2025 that had the White River at a lot of people's doorsteps. In fact, the river waters here flooded enough that I could walk just over a few cornfields and wade in it. That year, at least 90% of our stems were pulled after or in the rain, and for those flowers that seemed to really trap water droplets in their buds, I actually used a hair-dryer to remove the precipitation before storage. Planting tulips may be the easiest task of the year, but harvesting them is close on the list to the hardest, that’s for sure!
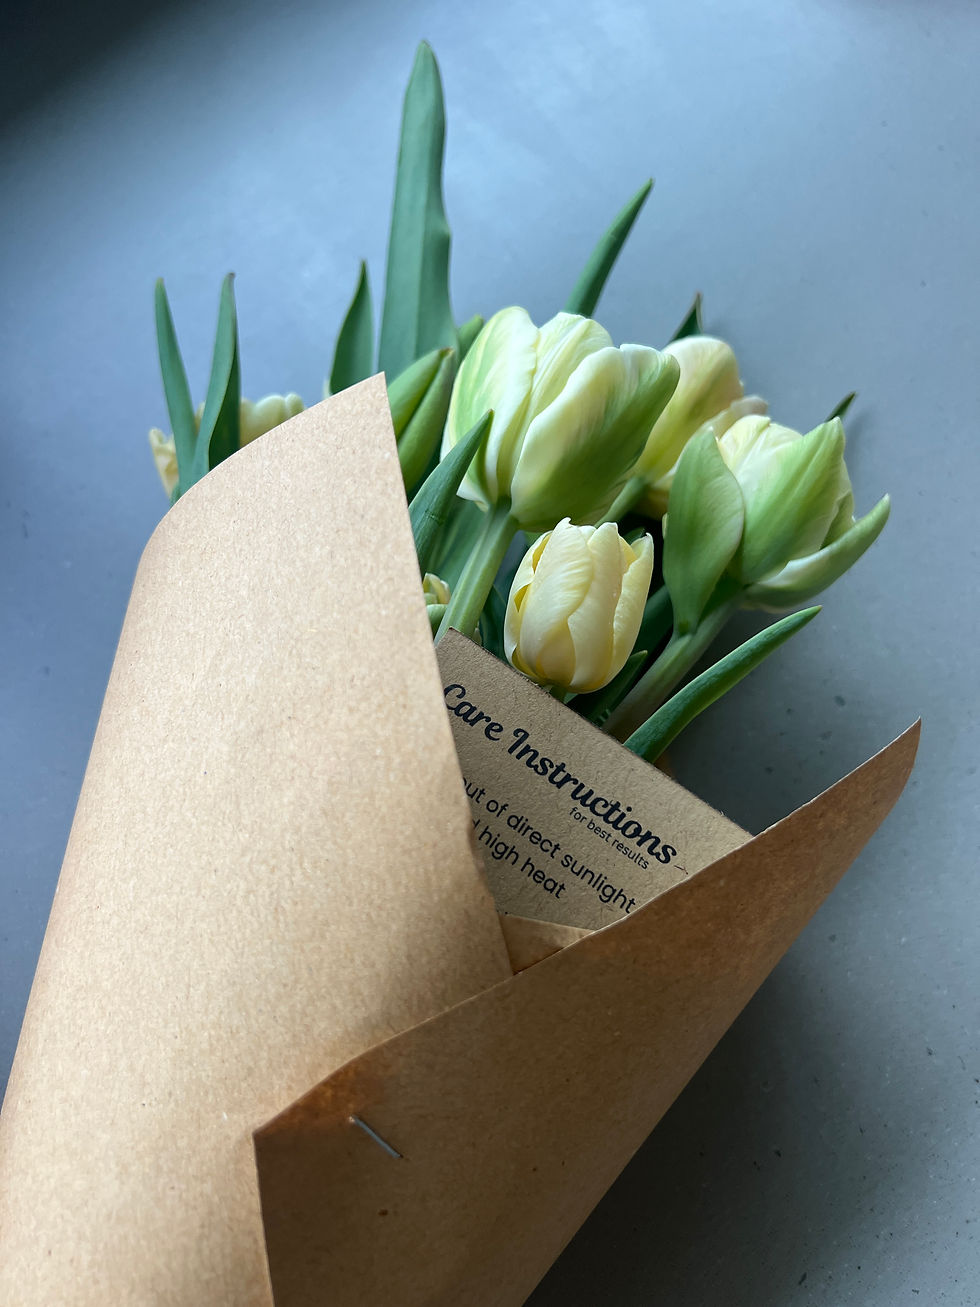
Now, because we are storing the tulips dry, or without a water source, they tend to go quite limp during their storage time. To keep them supported, we wrap them together in a piece of kraft paper or any other structured paper, like when we were kids making a pirate telescope. To rehydrate our tulips after dry-storage, we simply fill a vase or bucket with cold water, tear off the portion of paper that would be in the water so that it does not get soggy, and snip off the ends of the stems at about ½” to ensure the water is able to be absorbed. The stems come out of the fridge limp and floppy, but they hydrate and become turgid (structured and firm due to hydration) within a few hours!

Arranging with Tulips
Arranging with the tulips is easy! Tulips look devastatingly beautiful in groups of a single variety, mixed with other tulips, and mixed or arranged with other spring greens and blooms. If you are going for a uniform, single variety bouquet, you can use as many as you’d like. When mixing with other flowers or greeneries, use odd numbers of each variety, as this is more appealing to the human eye. Some great pairings for tulips are Cress, Lilac, foraged grasses, Hyacinth for short arrangements, new Willow growth, and Daffodils.
Due to the slender nature of tulips, I tend toward a vase with an opening and base that are both on the narrower side, which keeps the heads of the tulips closer together and prevents a large amount of dead space between them. Tulips also have a habit of “stretching” when in a vase. This means that their stems actually get longer as they age! I’ve noticed that doubled tulips don’t do this nearly as much as singles do, but they still get taller to a degree. Keep this in mind when putting your arrangement or bouquet together; where you place the bud/head in the beginning is NOT where it will end up when it blooms!
A note on using daffodils: let the stems of a daffodil cure in a separate vase before placing them into an arrangement. Daffodils have a sap when cut, which will kill off other flowers in the same water source, fittingly, another name for the flower is Narcissus, after the character in the Greek Story of the vain young man named Narcissus.
Thank you for reading and I hoped that this was a helpful and exciting read that gets you looking forward to tulip season! If you’re looking forward to tulips on your table, and don’t want to cut down your beautiful landscaping work, don’t forget to check out our Tulip Subscriptions in the Shop!


Comments